[[Category:{{{game}}} missions]][[Category:Arid Hills missions]]
Walkthrough
thumb|300px|right|Video walkthrough
Objectives
- Kill Moe
- Kill Marley
- "Rumors speak of Moe and Marley, two of the toughest skags to ever walk Pandora. I want their skulls mounted on my wall, but I'm too busy to go track them down myself. Instead, I'm offering to pay anyone to find them and take them down."
Finding Moe and Marley
They are located in the Arid Hills region. The mission marker doesn't indicate exactly where the two skags are, but instead points to the general area where they can be found.
Fighting Moe and Marley
Moe and Marley can present a formidable encounter, so it is highly recommended that they be separated and killed individually. They are hostile to bandits, so dragging them into range of any bandit groups can also assist with whittling down their life. The building on the hill near their location can also serve as a safety zone to fight from by jumping up onto the roof. Bandit respawns around the structure will provide more targets for the skags to chew on as well as adding firepower to take them down.
Climbing on top of the rocks near the New-U Station can provide another moderate safe zone to shoot from. From here, Moe cannot attack from the ground, while Marley's options will be restricted. Occasional lower level skags may also join the fray, so eliminating them when they appear is a high priority.
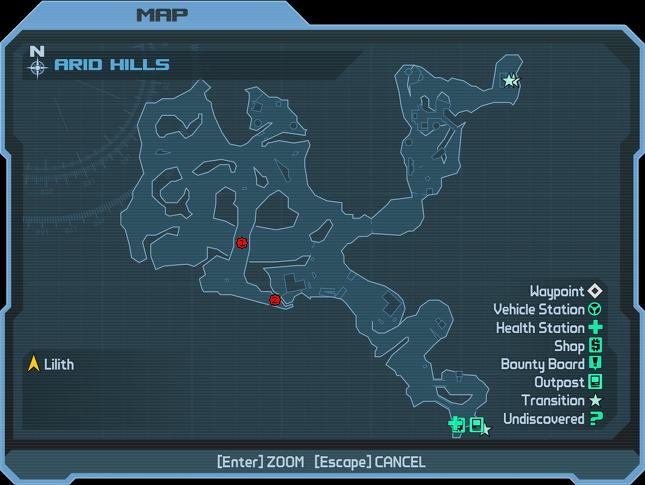
An alternative cheap approach to defeating Moe and Marley is to lure them over the stone bridge [marked as 1 in the map provided] then once they're fully over the bridge walk as far as possible to the east wall [marked as 2]. Once the player characters are positioned here, Moe and Marley will be unable to reach and will stand in place, with their howling allowing for many easy critical hits on them. Across the bridge there are skag and rakk nests. While the skags may be out of range the rakk may still present a problem to be wary of.
Another alternative is to find a collection of cacti. These can be exploited as cover, providing good targeting angles on Moe and Marley, while also reducing their opportunities to return fire.
Marley will tend to keep distance from characters, whereas Moe will always try to proceed to melee range. They use the same attacks except differentiated by element. Their attacks are:
- Claw attack: A simple slash with its claws to a character at melee range (Marley will rarely to never do that, due to its ranged AI).
- Charge attack: A sprinting headbutt attack, the sprint speed is quite high, thus this is usually hard to dodge, unless with obstacles around. this attack does minimal damage but closes the distance, and has a high knockback power. This attack is only available to Moe.
- Projectile attack: An arced shot of the corresponding element. The projectile shot by Marley can be shot in midair to destroy the missile, this is useful for avoiding damage when your shield is down.
- Stomp attack: A stomp along with a roar. This only happens in close range, but further than melee range. It is the most powerful attack of the three, and should be avoided. It also has a large push, but can be mitigated by jumping away before it connects. When used on a sloped area, this attack usually misses if you are on the lower side on the slope, even within the radius.
Marley can be easy to kill from a distance with critical hits. Obtain a scoped weapon and shoot her in the mouth every time she spits the shock balls. The projectiles can be avoided by dodging. On the first playthrough a few shots with a sniper rifle can do significant damage. A Jakobs Skullmasher would be ideal later on.
Killing Marley before Moe can be beneficial, because Marley's shock damage is tuned to depleting shields, while Moe's incendiary attacks are a more effective damage dealer to flesh.
Notes
- The balls that Marley shoots will explode if they are hit in mid-air.
Turning In
Once Moe and Marley are dead, it is recommended to do the other missions in the zone before returning to the bounty board. usually along side Scavenger: Sniper Rifle and Sledge: To The Safe House.
Completion
- "The rumors were true?! Outstanding! By accepting this payment, you agree that I get to take all credit for killing these monsters. The ladies of Sanctuary will be so impressed!"