(Re-wording.) |
mNo edit summary |
||
| Line 3: | Line 3: | ||
There are many techniques to defeat Crawmerax but there are only two distinct requirements: |
There are many techniques to defeat Crawmerax but there are only two distinct requirements: |
||
*You must be on the battlefield, i.e. the arena at the top floor. |
*You must be on the battlefield, i.e. the arena at the top floor. |
||
| − | *You must have one person on the battlefield at the top of the elevator. If everyone dies, crawmerax will be at full health next time he |
+ | *You must have one person on the battlefield at the top of the elevator. If everyone dies, crawmerax will be at full health next time he is encountered. |
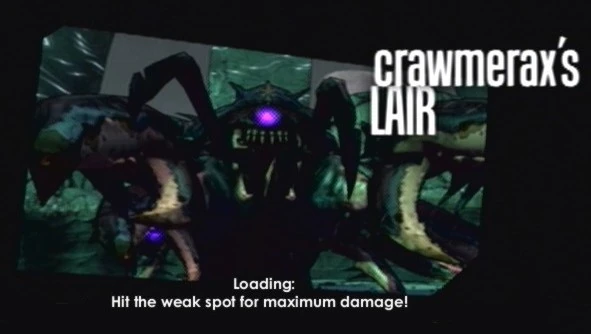
[[File:Hit_the_weak_spot_small.jpg]] |
[[File:Hit_the_weak_spot_small.jpg]] |
||
Revision as of 11:36, 7 October 2010
Overview
There are many techniques to defeat Crawmerax but there are only two distinct requirements:
- You must be on the battlefield, i.e. the arena at the top floor.
- You must have one person on the battlefield at the top of the elevator. If everyone dies, crawmerax will be at full health next time he is encountered.
Criticals
You must destroy his six critical points to damage him; any impacts on his exoskeleton will not deal any damage. thumb|350px|right
- Eye: The hitbox of the eye extends to the majority of the head section, making this the easiest critical point to take out.
- If Crawmerax cannot see you because you are in a blind spot, shooting him will cause him to turn - and usually, advance - in your direction. This can be used to draw fire away from a teammate in danger, or reviving another.
- When aiming for the eye from the side, or even at a slight angle, the hitboxes of the antennae will block your shot, so aim for the rest of the head and hope for a hit.
- Claws: The criticals at the back of Crawmerax's four claws - two smaller, two larger ones - are the easiest to hit, second only to the eye.
- Taking out any critical point will aggravate Crawmerax and cause him to roar in his position, as is usually seen. During the better part of each half of the roar, the critical points behind the claws are exposed from all directions, and can be taken out easier.
- When firing from the front, the joints of each claw will occasionally allow for a hit, so open fire on his joints if you are out of open targets.
- Back: The critical point at the dorsal region of the back is the hardest to hit especially on singleplayer, as Crawmerax will usually be advancing towards you. The most convenient way to take out the back critical is to wait for one of Crawmerax's major attacks.
- The forward dive will burrow him underground, and coming up again at a (seemingly-)random location. If you are lucky, and your sights are trained on his marker on the enemy tracker, you can get off a few shots if he emerges facing away from you.
- The backward dive will knock you up and deal extreme damage, but he will always emerge in the direction he was facing when he dived. Hiding behind either of the two pillars or using Lilith's phasewalk will prevent you from being hit by the shockwave, and preempting the rise back up will allow you a few seconds of shooting when he recovers from the dive.
- The lunges and acid barrage will always point him in the direction he is attacking, so teammates without the aggro can shoot from behind.
Weapons for Crawmerax
Given enough time and with enough luck, any weapon of sufficient standard will kill Crawmerax. Here are some weapons of choice.
Sniper Rifles
- S&S Orion
- With lightning rounds that split into three or four upon ricochet, the Orion is used when you don't have a clean shot and are hoping for a lucky break, e.g. shooting through claw joints or past the antennae hitboxes.
- Jakobs Bessie
- Dealing +500% critical hit damage but at a very slow fire rate, the Bessie is used when you don't have aggro, e.g. safe spots or during a teammate's aggro. With points invested into the right skills, and armed with the right class mod, the Bessie is able to take out critical points in one hit. [1]
- Jakobs Skullmasher
- Firing multiple projectiles for a higher chance of criticals, the Skullmasher is the accessible alternative to the ultra-rare Bessie. Depending on playthrough or class mod or number of players, it too can take out critical points in one hit.
- Torgue Cobra
- The incredibly high explosive damage leads to massive critical hits. Not as strong as the bessie, but a better fire rate means more opportunities for shots to connect.
- Dahl Penetrator
- Combining power and fire rate, the Penetrator is best used with a means of ammo regeneration, such as a Roland with a Support Gunner mod or a Mordecai with sniper ammo regeneration. The added critical hit bonuses are helpful, as the only hits that do damage to Crawmerax are those within the six purple areas. It can easily destroy his critical points in one clip (11-17 shots, <2 seconds of shooting) if aimed well.
Rocket Launchers
- Hyperion Nidhogg
- The airburst rockets are very useful when attempting to take out the back critical blocked by the frontal armor, and the Nidhogg is a popular choice when firing from the front. The small rockets fire downwards and either hit the back critical directly, or deal splash damage off the spines or back armor.
- Vladof Mongol
- Marginally useful for any critical but losing out to the Nidhogg for back shots, the Mongol's shotgun effect may even hit more than one critical point with the same shot.
Submachine Guns
- Maliwan Tsunami
- Shock bullets which ricochet are more effective than normal rounds which don't, especially with harder-to-hit criticals; the Tsunami can and will deliver at up to a 12.5 fire rate.
- Double Anarchy
- When normal rounds are not good enough, fire four of them per trigger pull and you're bound to hit something. Once you have Crawmerax in your crosshairs, opening up on him always gets criticals and emptying all of the Anarchy's clip will drain a significant amount of health, when presented with enough targets.
Support Machineguns
- The Chopper
- Very much a last-resort weapon, The Chopper will chew through your entire combat rifle ammo bank in seconds, even in one clip on a mag-spec soldier. But the multiple projectiles and insane fire rate will net you an abundance of criticals.
Crawmerax strategy
Once again, it all depends on your personal playing style, so do what works for you. Lilith has the greatest advantage with Phasewalk, and makes these strategies even more effective; Roland's Scorpio Turret may also prove helpful by taking aggro.
Battlefield movement
Crawmerax will follow the player doing the most damage to him at any given time, and ignore other players. The minions will focus on the player that Crawmerax is attacking, unless they are very close to another player. Players can trade off Crawmerax focus to allow movement around the battle field. Because the minions have rushing attack moves, it is best to circle and use zig-zag motions, jumping or even crouching to avoid being hit, while backing away firing. Use the pillars for cover or as obstacles - hopefully in your favor. When playing with others, avoid inadvertently leading Crawmerax to a teammate at risk or reviving. Instead, keep firing and draw fire away from your teammates to allow them a better shot. See #Video Examples for more detail.
Safe spots
- The easiest safe spot to reach is on the ledge directly west north west from the top of the elevator. When in this spot Crawmerax will not move towards you. It is possible to run to this spot with any character class.thumb|300px|right|Running to safe spot one.
- The cliff edge is a risky place to get to and stay on, especially with minions pushing you off every chance they get. You are safe from Crawmerax's dives and lunges, but not the acid barrage.
- With Crawmerax looking away, at a teammate or after phasewalking, taking cover behind the pillars releases your aggro and gives you a better chance to heal up, as you would only have to face the minions in your immediate proximity. Crawmerax cannot see you through the pillar, so looking out slightly may allow you to get a few shots at his back before he turns around.
- It is possible to stand on the pillars or even the arena wall by exploiting launches. Anticipating a backward dive or jumping as the elevator pushes you through the red energy field may launch you high enough into the air and at the correct angle to land on an elevated area, and you will be protected against everything save for the acid barrage.
Blind spot
- The left corner of the ledge is a blind spot for Crawmerax and his minions; the AI will deactivate and you can shoot at your own leisure. This is provided none of the enemies actually sees you heading into the corner itself, as the AI elements can and will pursue you if you get to the extreme corner while they are locked on to you. This also applies if an ally heads to your corner while s/he is being tailed by the AI - you will be detected as well.
Weapons for minions
Other than explosive rounds, which are relatively ineffective in this case, each of Crawmerax's three species of minions are weak to one of the other three elements.
Green Craw Worms - incendiary
- Maliwan Hellfire thumb|300px|right|Green Craw Worm, Maliwan Volcano, safe spot.
- Basic x2 multiplier and insane damage over time, the latter of which is also extremely useful for second winds or setting up for one.
- Maliwan Volcano
- Scoring a critical is an easy one-shot kill, and is not very difficult when scoped.
- S&S Draco
- High powered x3 or x4 incendiary machinegun.
- Maliwan Firehawk
- Usually useful for a pistol-spec Hunter, the x6 procs of a Firehawk will be devastating for critical hits.
Armored Craw Worms - corrosive
- Maliwan Defiler thumb|300px|right|Armored Craw Worm, Maliwan Defiler.
- High proc damage and accurate delivery of raw power.
- S&S Serpens
- Good rate of fire dealing moderate damage, with an extended magazine for sustained corrosion.
- Maliwan Crux
- Really easy to get criticals on the head due to being a shotgun and, if enough bullets get critical, you could run away and it will eventually die from corrosive damage.
Craw Maggots - shock
- Atlas Aries thumb|300px|right|Craw Maggot, Lightning Viper, safe spot.
- 100% elemental chance that heals you or your teammates.
- S&S Orion
- 100% elemental chance, even more effective upon ricochet. And you might not even have to change weapon to target Crawmerax.
- Hyperion Nemesis
- High elemental chance with high fire rate.
- Lightning/Fulgurating weapons
- Shock weapons have extremely little coverage, as far as legendary weapons go, so you're going to need one eventually.
Minion strategy
All minions have a ranged attack that won't kill you, but will take you to negligible health quickly, meaning that subsequent attacks will kill you immediately. Proper strafing should save you lots of pain here. Minions are also your biggest threat in the blind spot, or in any safe spot for that matter. According to a Borderlands zone tip hand to hand melee attacks to Craw worms impact their armor allowing for greater damage. It is possible to do 500+ damage per melee hit, but it is unknown if the hits actually increase subsequent damage.
It's always important to keep in mind real-game strategies while fighting Crawmerax; you can always watch your radar, even when zoomed-in. Also, if you get a second wind, grab health to reset the bleed-out time.
Green Craw Worms
- Shoot their eye to score a critical hit.
- Be careful, as they are very fast.
- Anticipating their rush attack with a jump helps avoid the critical hit.
- Jumping can also avoid AOE damage from their ranged attack.
- An incendiary weapon is the most effective weapon against the Green Craw Worm. Look for a Maliwan Volcano or Hellfire, though, the Hellfire has often proven more effective.
- Always finish off the Green Worm, as the incendiary damage won't usually finish him like the corrosive damage on an Armored Worm.
- Since their ranged attack is "smart" and will try to lead their target when it's moving in a single direction, you can usually strafe in such a pattern to "juke" the worm into shooting on either side of you.
Armored Craw Worms
- Exploit their slow movement speed, as long as you're not strafing or running backwards, any level 61 character can outrun an Armored Worm
- They are extremely weak to corrosive damage. Usually, you don't even need to fire the entire clip of a Serpens at the worm because the corrosive damage with finish the job. Another good weapon to use against Armored Worms is a high-damage Maliwan Crux.
- Keeping these two tips in mind, you can easily take an Armored Worm down to about 1/3-1/4 health and leave him alone to die, moving on to the next enemy.
Craw Maggots
- Craw Maggots are best dealt with by a few well-placed shots to their glowing eye.
- Keep an eye on your radar for a red dot that moves back and forth while growing. The Maggot approaches quickly while weaving in a snake-like pattern until a certain point. Then it will come directly at you.
- When battling one, it is best to keep away from ledges, as they will use their jumping attack to launch you off of the staging area.
- If you're feeling adventurous, it is possible to goad them into jumping, and you can move aside or crouch at the last second, leaving the Maggot to plummet to its doom.
- Using shock weapons is very effective. The S&S Orion sniper rifle, Atlas Aries pistol, and the Eridian Thunder Storm will take them down in two to three shots. Not to mention that these weapons will stun the Maggot, causing it to stop and cry-out.
- When dealing with two Maggots at once, keep the above tip in mind to "stun lock" them both.
Class Mods
By the same logic as weapon setups go, any class mod which suits your playing style will benefit you more than conforming to a popular one which you are less familiar with.
Phasewalk cooldown
- Lilith: Catalyst
Drop rate
(+2TFRI seems to affect dropped weapons, but the exact mechanism is not yet proven; current theories include equipping before zone-in or before the kill, but testing has yet to be done in either aspect.)
- Lilith: Catalyst
- Mordecai: Scavenger, Hunter
Survival
- Lilith: Defender, Dahl Professional
- Roland: Tactician, Atlas Champion, S&S Gunman
- Mordecai: Survivor, Truxican Wrestler, Anshin Peace Keeper
- Brick: Centurion, Titan, Torgue Bad Ass, Pangolin Tank
Elemental
- Lilith: Tormentor, Mercenary, Tempest/Firefly/Plaguebearer, Maliwan Specialist
- Roland: Shock Trooper
- Mordecai: Assassin
Sniping for criticals
- Lilith: Spectre
- Mordecai: Sniper, Ranger
Video Examples
thumb|300px|rightIt is possible to shoot Crawmerax to distract him from other players on the battle field. In this video example Mordecai is in The West North West Ledge safe spot, and is shooting Crawmerax as Lillith exits the top of the elevator. The Siren but in this example does not use Phase Walk to get to the safe spot. Notice that Crawmerax does not move towards the Siren as she is running across the open field.
thumb|300px|leftThese short videos demonstrate shooting Crawmerax to distract him and his minions from other players on the field. Notice that Crawmerax does not move towards the Siren even though she is clearly out of the Ledge Safe spot boundaries, and is on the battle field properly. Note that once another player starts to damage Crawmerax he will move to them. This strategy is used to get people into safe or blind spot positions.
thumb|300px|leftIn the second video Mordecai moves all the way to the right pillar near the dead lance blind spot without being noticed by Crawmerax. Once the Siren stops firing on Crawmerax he will turn towards the blind spot but he won't be able to land a melee attack through the pillar. At this point the Siren could easily shoot his back segment.